
A year or so ago I was given a Revell model of the USS Voyager (thanks Rick). While I don’t have the patience and attention-to-detail for model kits, I had been looking for an Arduino project and thought this might be a nice kit to consider a multi-mode lighting system controlled by Arduino.
I’ve tinkered with circuit design for model lighting before to flash LEDs to simulate a aircraft rotating beacon, and had scribbled away somewhere an early design. However messing around witch matching capacitors and resistors to get just the right attack and decay curve is *so* much work, the option of just coding the behaviour into an Arduino controlled set of lights had obvious appeal.
My goal for this project was to have a fairly complete set of lighting installed into the model with a button or other means of cycling through different lighting modes. The lighting was to include:
- running lights – these are steady-on red/ green lights located either side of the hull
- navigation lights – flashing white lights running through the hull midline
- cabin lights – white lights behind the windows in the hull
- impulse engine lights – there are two of these, the red light in the warp nacelles and a soft orange glow coming out of vents on the back of the nacelles
- warp engines – these are the long blue glowing lights along the edges of the warp nacelles
- deflector arrays – there are two of these – the main one has a blue glow around it, the secondary one a soft red glow
- hull spotlights – these pick out details on the hull, such as the ship name
- photon torpedos – these are pulsing red lights located front and rear of the main hull
In the end I came up with the following modes:
- Mode 0 – all off
- Mode 1 – running lights and navigation lights on
- Mode 2 – cabin lights come on in sections moving through both hulls
- Mode 3 – engines on. Impulse engines glow red and warp nacelles fade up blue
- Mode 4 – fire torpedos – the torpedo lights pulse in a firing sequence
- back to mode 0
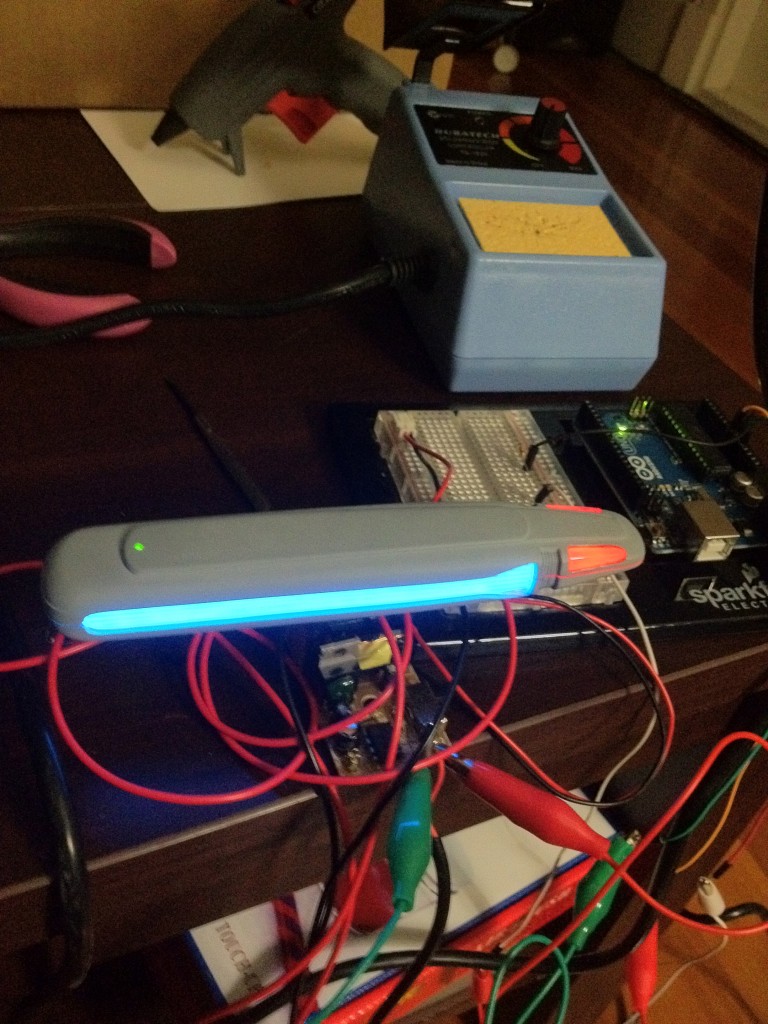
A lot of other people have completed this exact model with custom lighting, however everyone seems to use LEDs for the blue warp engine lighting. I don’t really like this approach as it results in obvious point sources of light in the blue strip of the nacelle, whereas in the show the blue light is a more consistent intensity glow throughout. I was interested to see how effective electroluminescent lighting would be for this task. Electroluminescent lighting (EL for short) provides a soft, consistent light along the length of a wire or strip – picture those amazing costumes from Tron. EL wire comes in many forms including flat strips which seemed like a good fit for this project. EL wire isn’t cheap however (around $30 for a 1 metre strip), uses High Voltage (ouch when you touch it) and is an absolute pain to cut and shape as it is prone to shorting out.
After much trial and error I managed to cut blue EL strips to length and embed in the model nacelles – I think the result is pretty much bang on for the real thing.

Leave a Reply